
- A live WordPress site on a free Brimble address (
https://your-name.brimble.app) - A database that stores posts, pages, and users
- Storage so photos and plugins do not disappear when you redeploy
- Optional security for WordPress (recommended)
- Optional custom domain and small config files
Before you start
The big picture
WordPress on Brimble is two projects that work together:- A database: where posts, pages, and logins are stored
- WordPress itself: the website software, run from the official WordPress image
Checklist
- Create the database
- Create WordPress and connect it
- Turn on storage for uploads
- Finish the setup wizard in your browser
- Turn on WordPress protection (recommended)
- (Optional) Add your own domain
- (Optional) Raise upload limits with a small config file
Step 1: Create the database first
WordPress cannot run without a database. Do this before you create the WordPress site.- Open the Brimble dashboard.
- Click New project.
- Choose Database.
- Pick MySQL or MariaDB (both work with WordPress).
- Leave the version as the default unless you know you need another one.
- Choose a region: remember it; WordPress must use the same one.
- Pick a size. Start small; you can upgrade later.
- Give it a clear name, for example
my-blog-db. - Click Create / Provision.
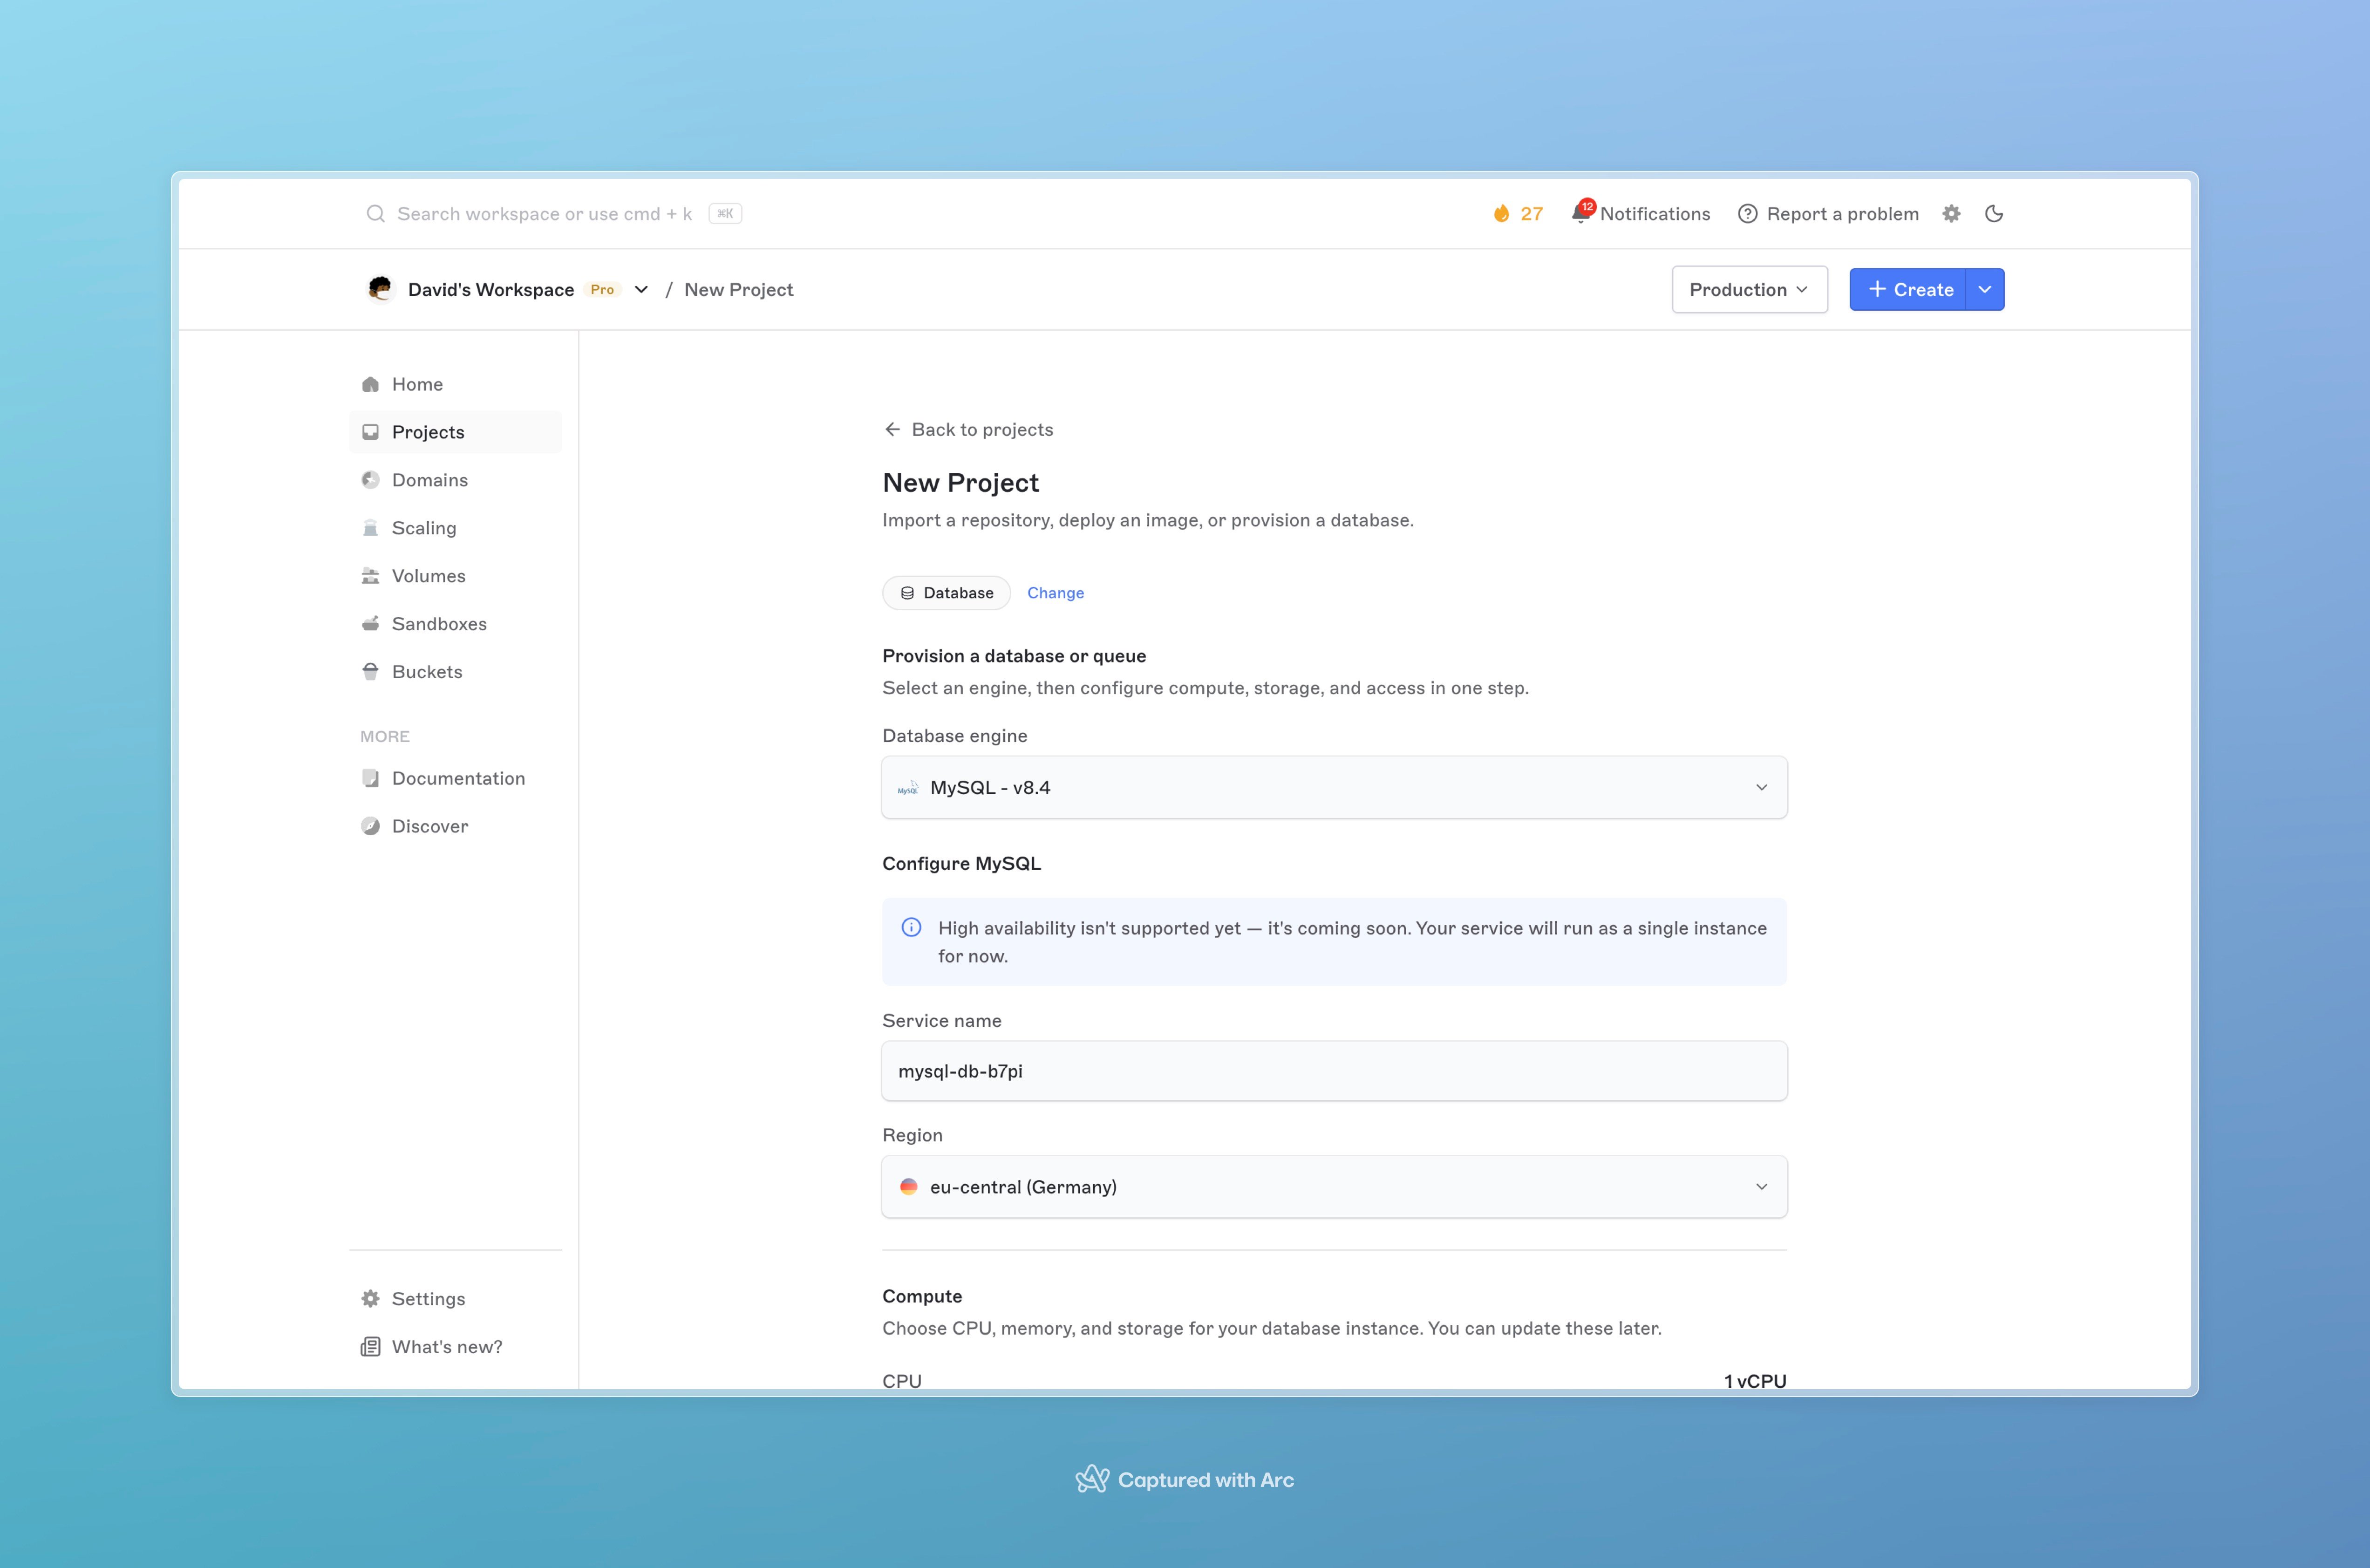
Creating a MySQL database for WordPress.
Where the connection details live
Open the database project. You will see a list of secrets (connection details). You will copy these into WordPress in the next step. You mainly need:
Recommended: use the private connection when WordPress and the database are in the same place on Brimble. It is faster and stays on Brimble’s private network.
Also fine: use the public host if you prefer, or if private is not available.
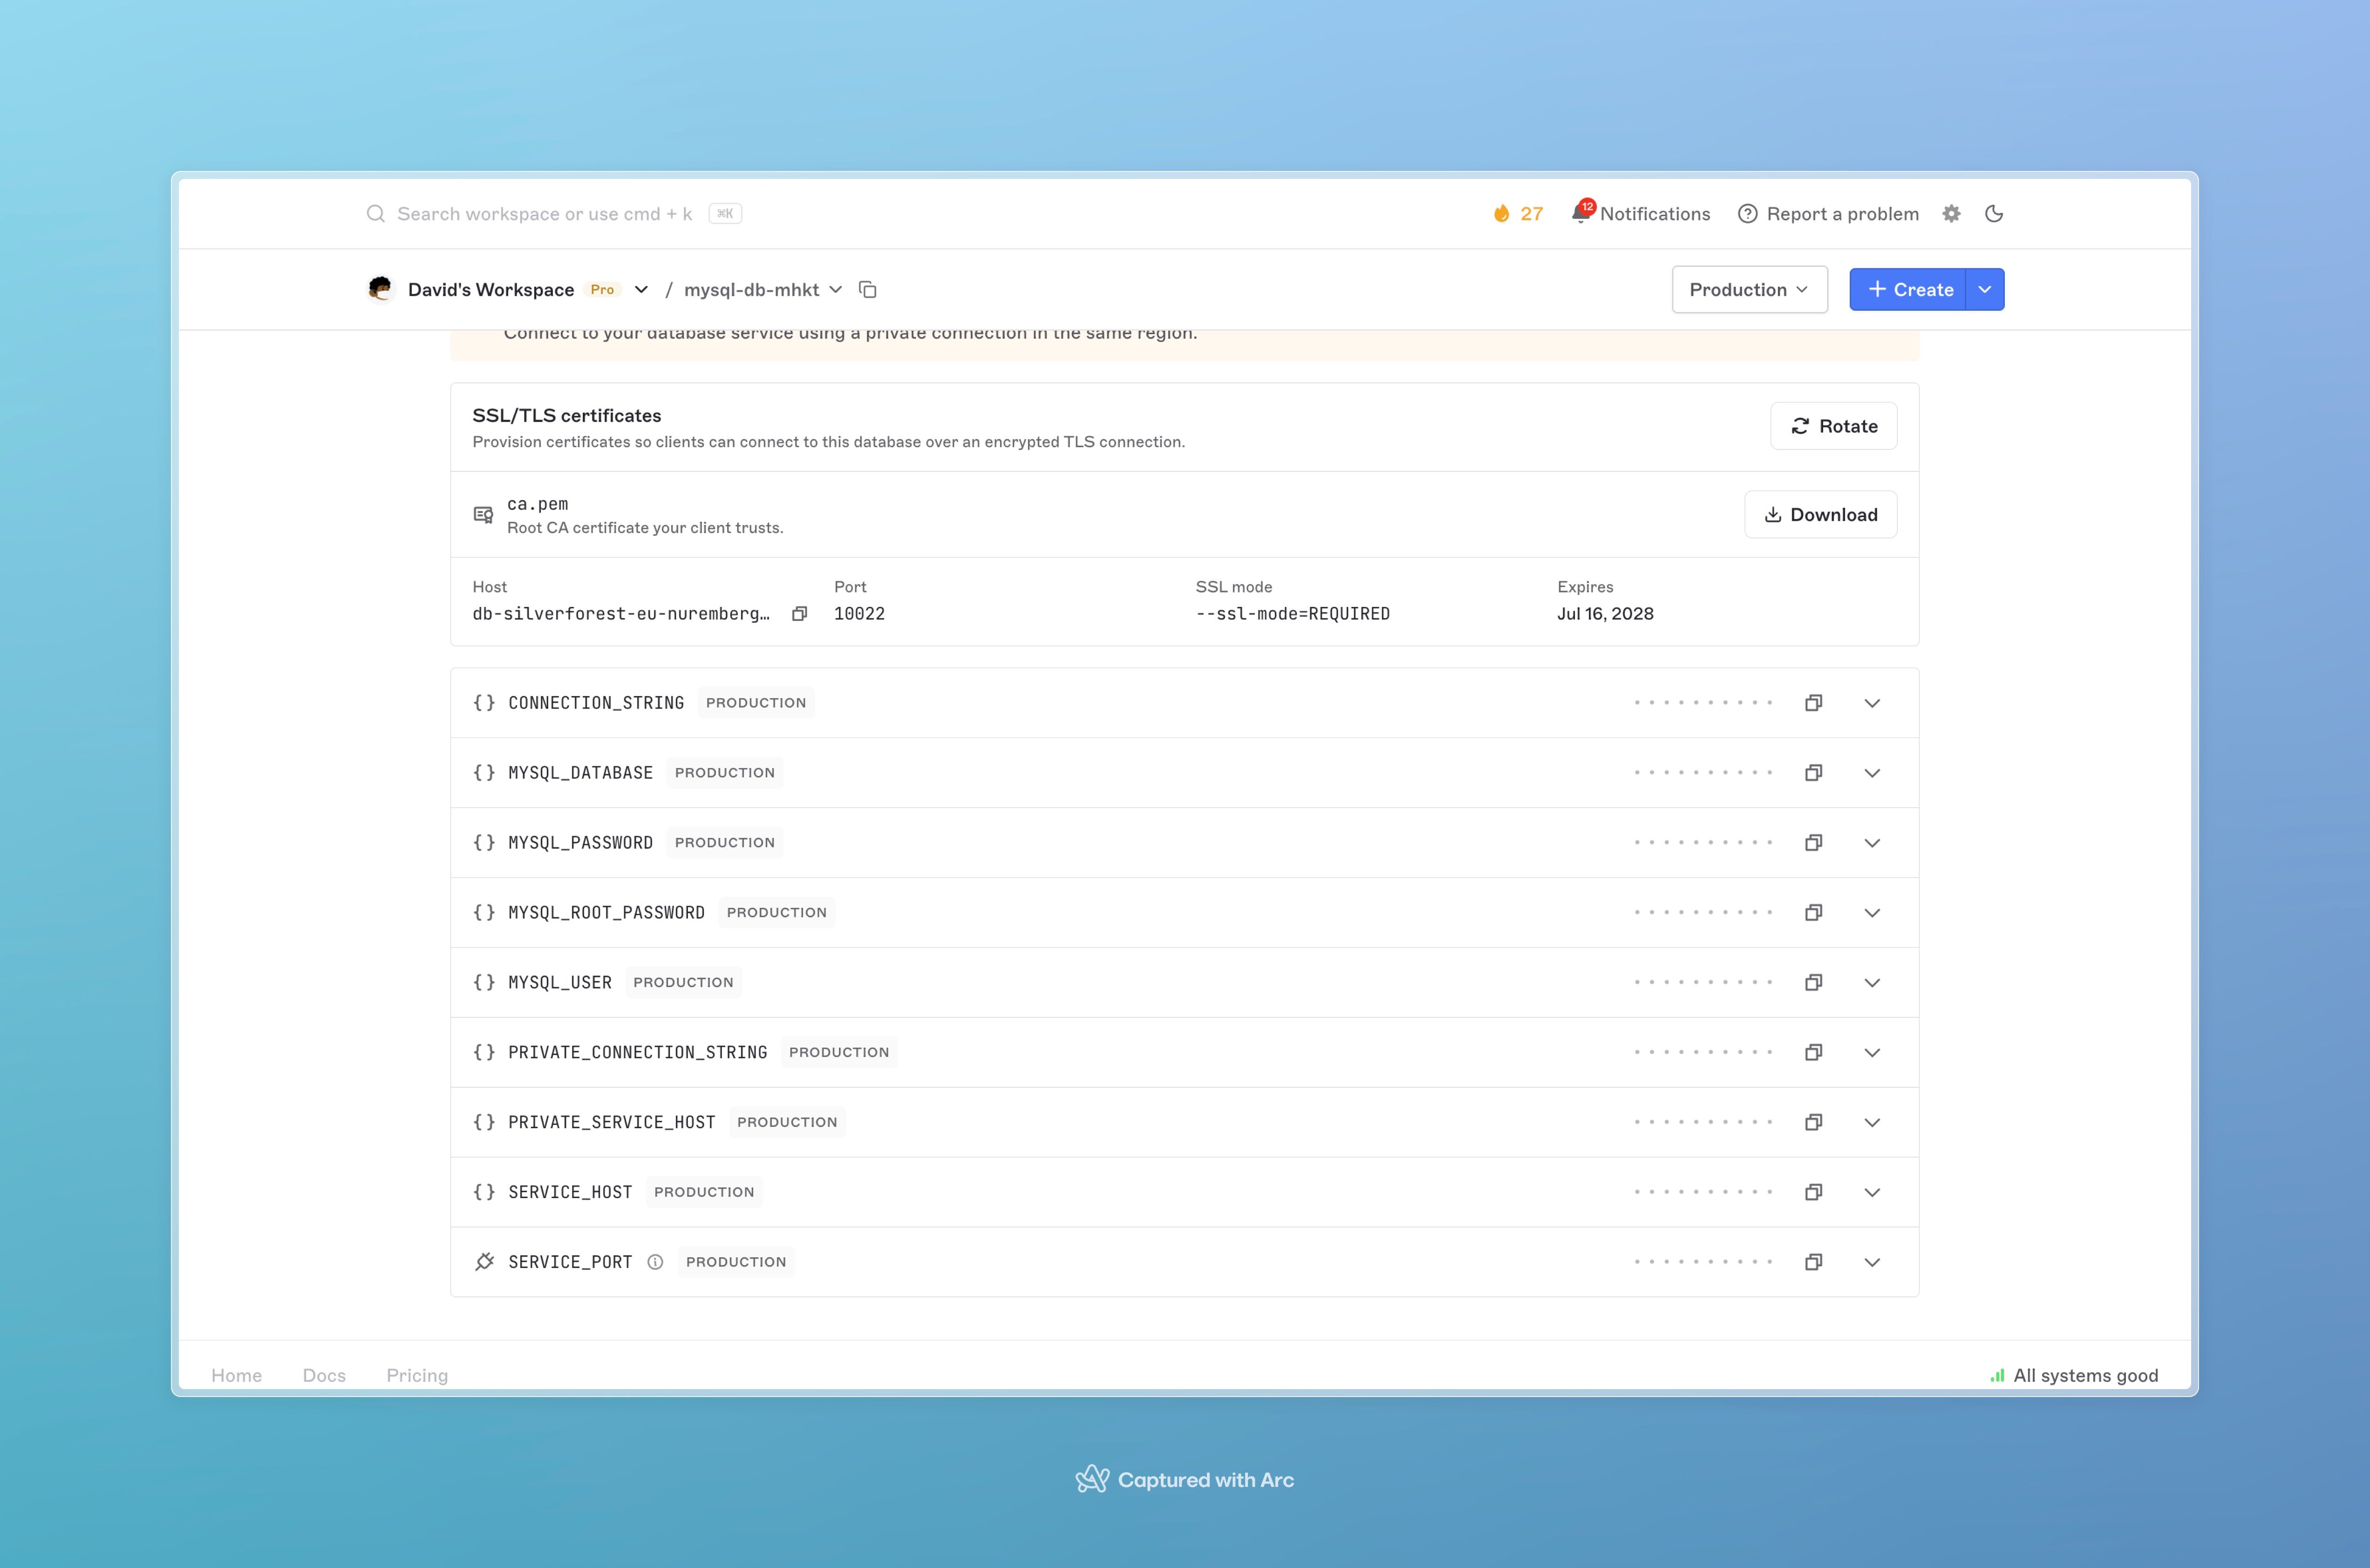
Database secrets: host, port, user, password, and database name.
Step 2: Create WordPress
- Click New project again.
- Choose Docker image (you are not connecting a Git repo for standard WordPress).
- For the image name, use the official WordPress image, for example:
wordpress:php8.2-apache if you prefer.
- Leave private registry credentials empty for this public image.
- Choose the same region as the database.
- Pick a small compute size to start.
- Give the project a name (this becomes your free URL, for example
https://my-blog.brimble.app).
Secrets: how WordPress finds the database
On the create screen (and later under the Secrets tab), add these values. Important: set PORT to 80. The official WordPress image expects that.Easiest option: reference the database project
If your database project is namedmy-blog-db, you can point WordPress at it with references (Brimble fills in the real values at deploy time). Adjust the name to match your database project:
SERVICE_HOST instead of PRIVATE_SERVICE_HOST.
You can also open the database secrets list and paste the values by hand.
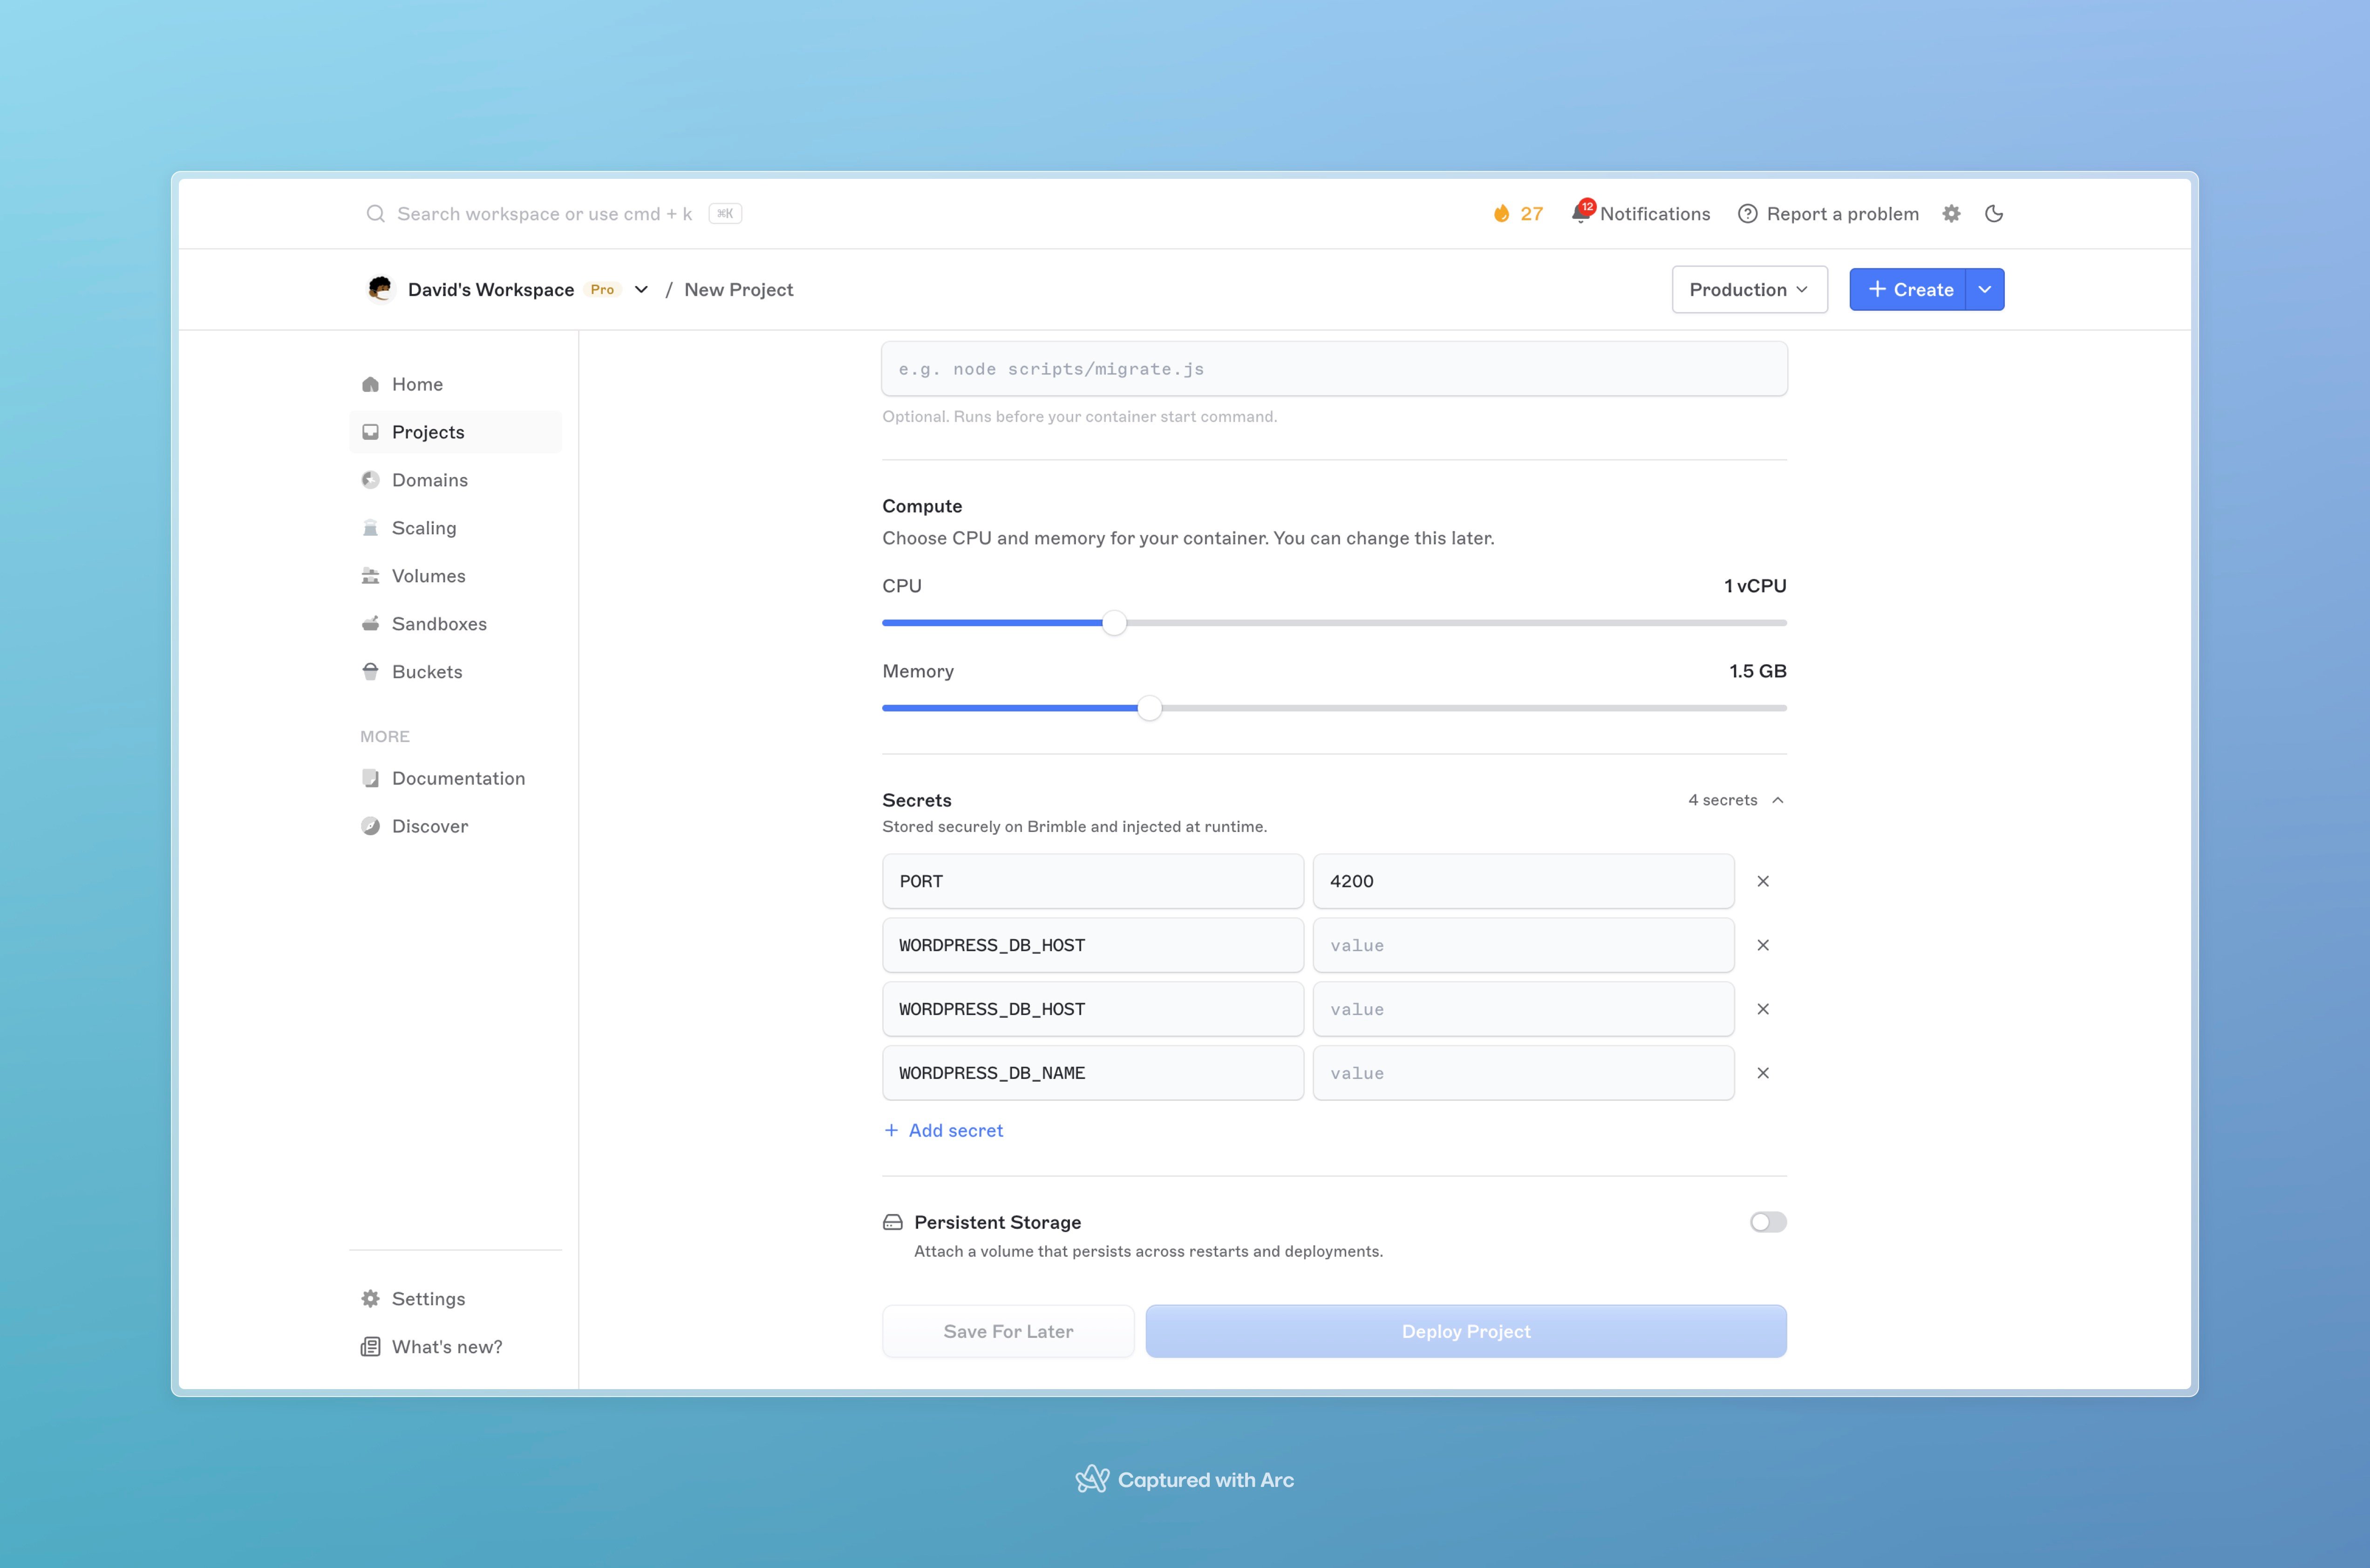
Adding PORT and database secrets when creating the WordPress project. Set PORT to 80.
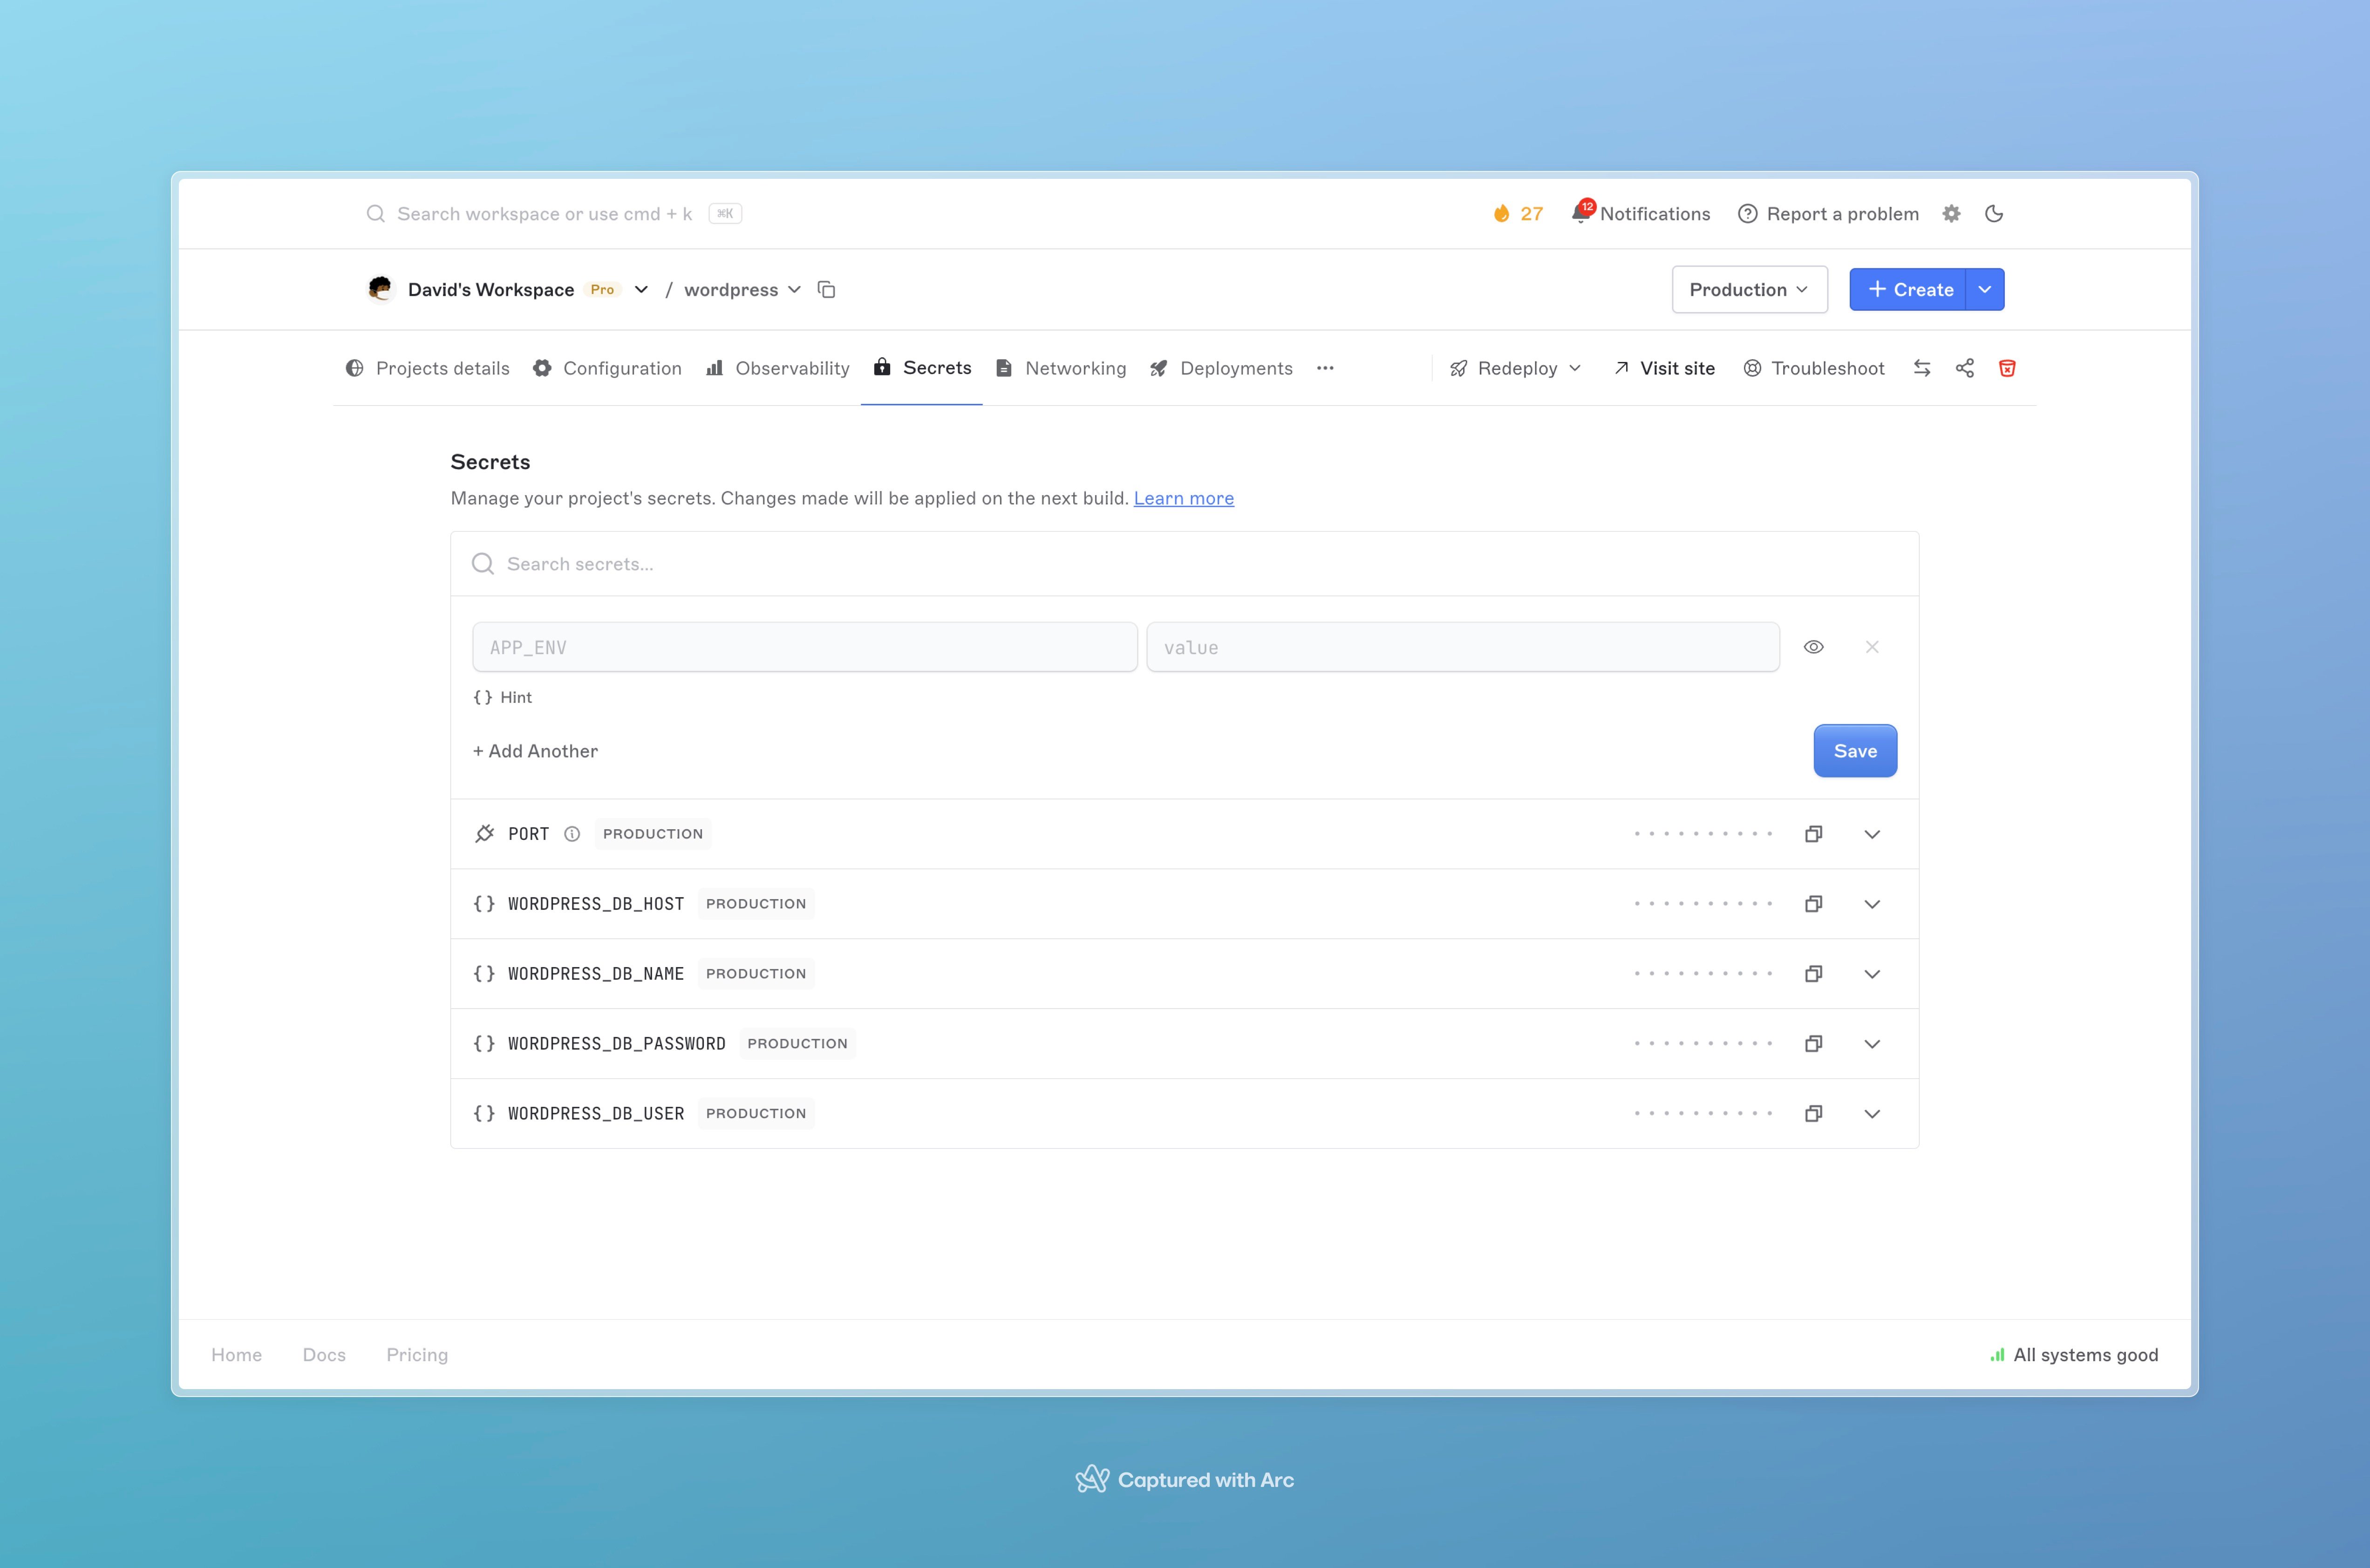
Secrets tab on the WordPress project after deploy.
Step 3: Turn on storage for uploads
If you skip storage, media uploads and many plugins can be lost when the site restarts or redeploys.- Turn on Persistent Storage (when creating the project, or later under Configuration → Resources).
- Set the mount path exactly to:
/var/www/html). Only wp-content.
You can create a new volume or attach one you already have in the same region.
Storage price (typical)
Storage is charged by size each month. In the size dropdown you will see options similar to:
That is about $0.25 per GB per month. Always trust the price shown in the dashboard.
10 GB is enough for most small sites.
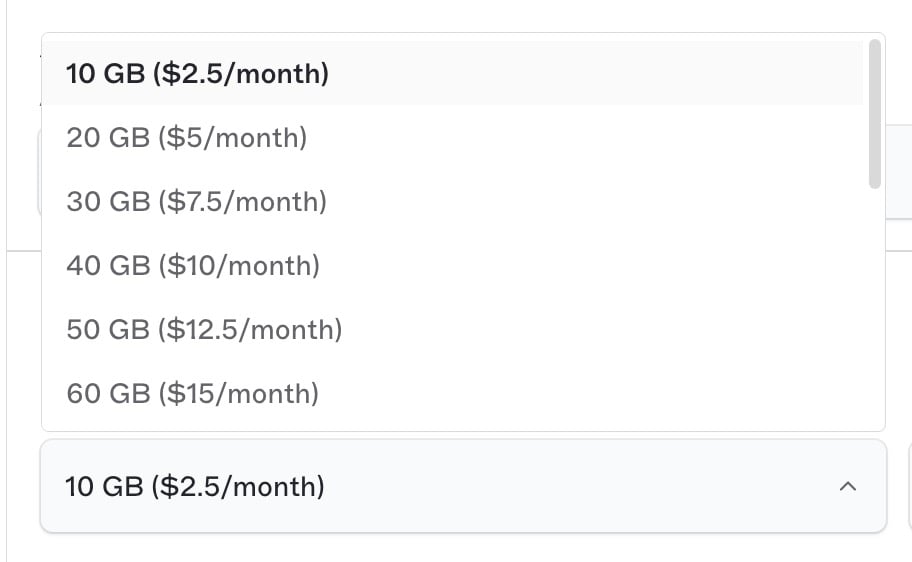
Choosing volume size and seeing the monthly price.
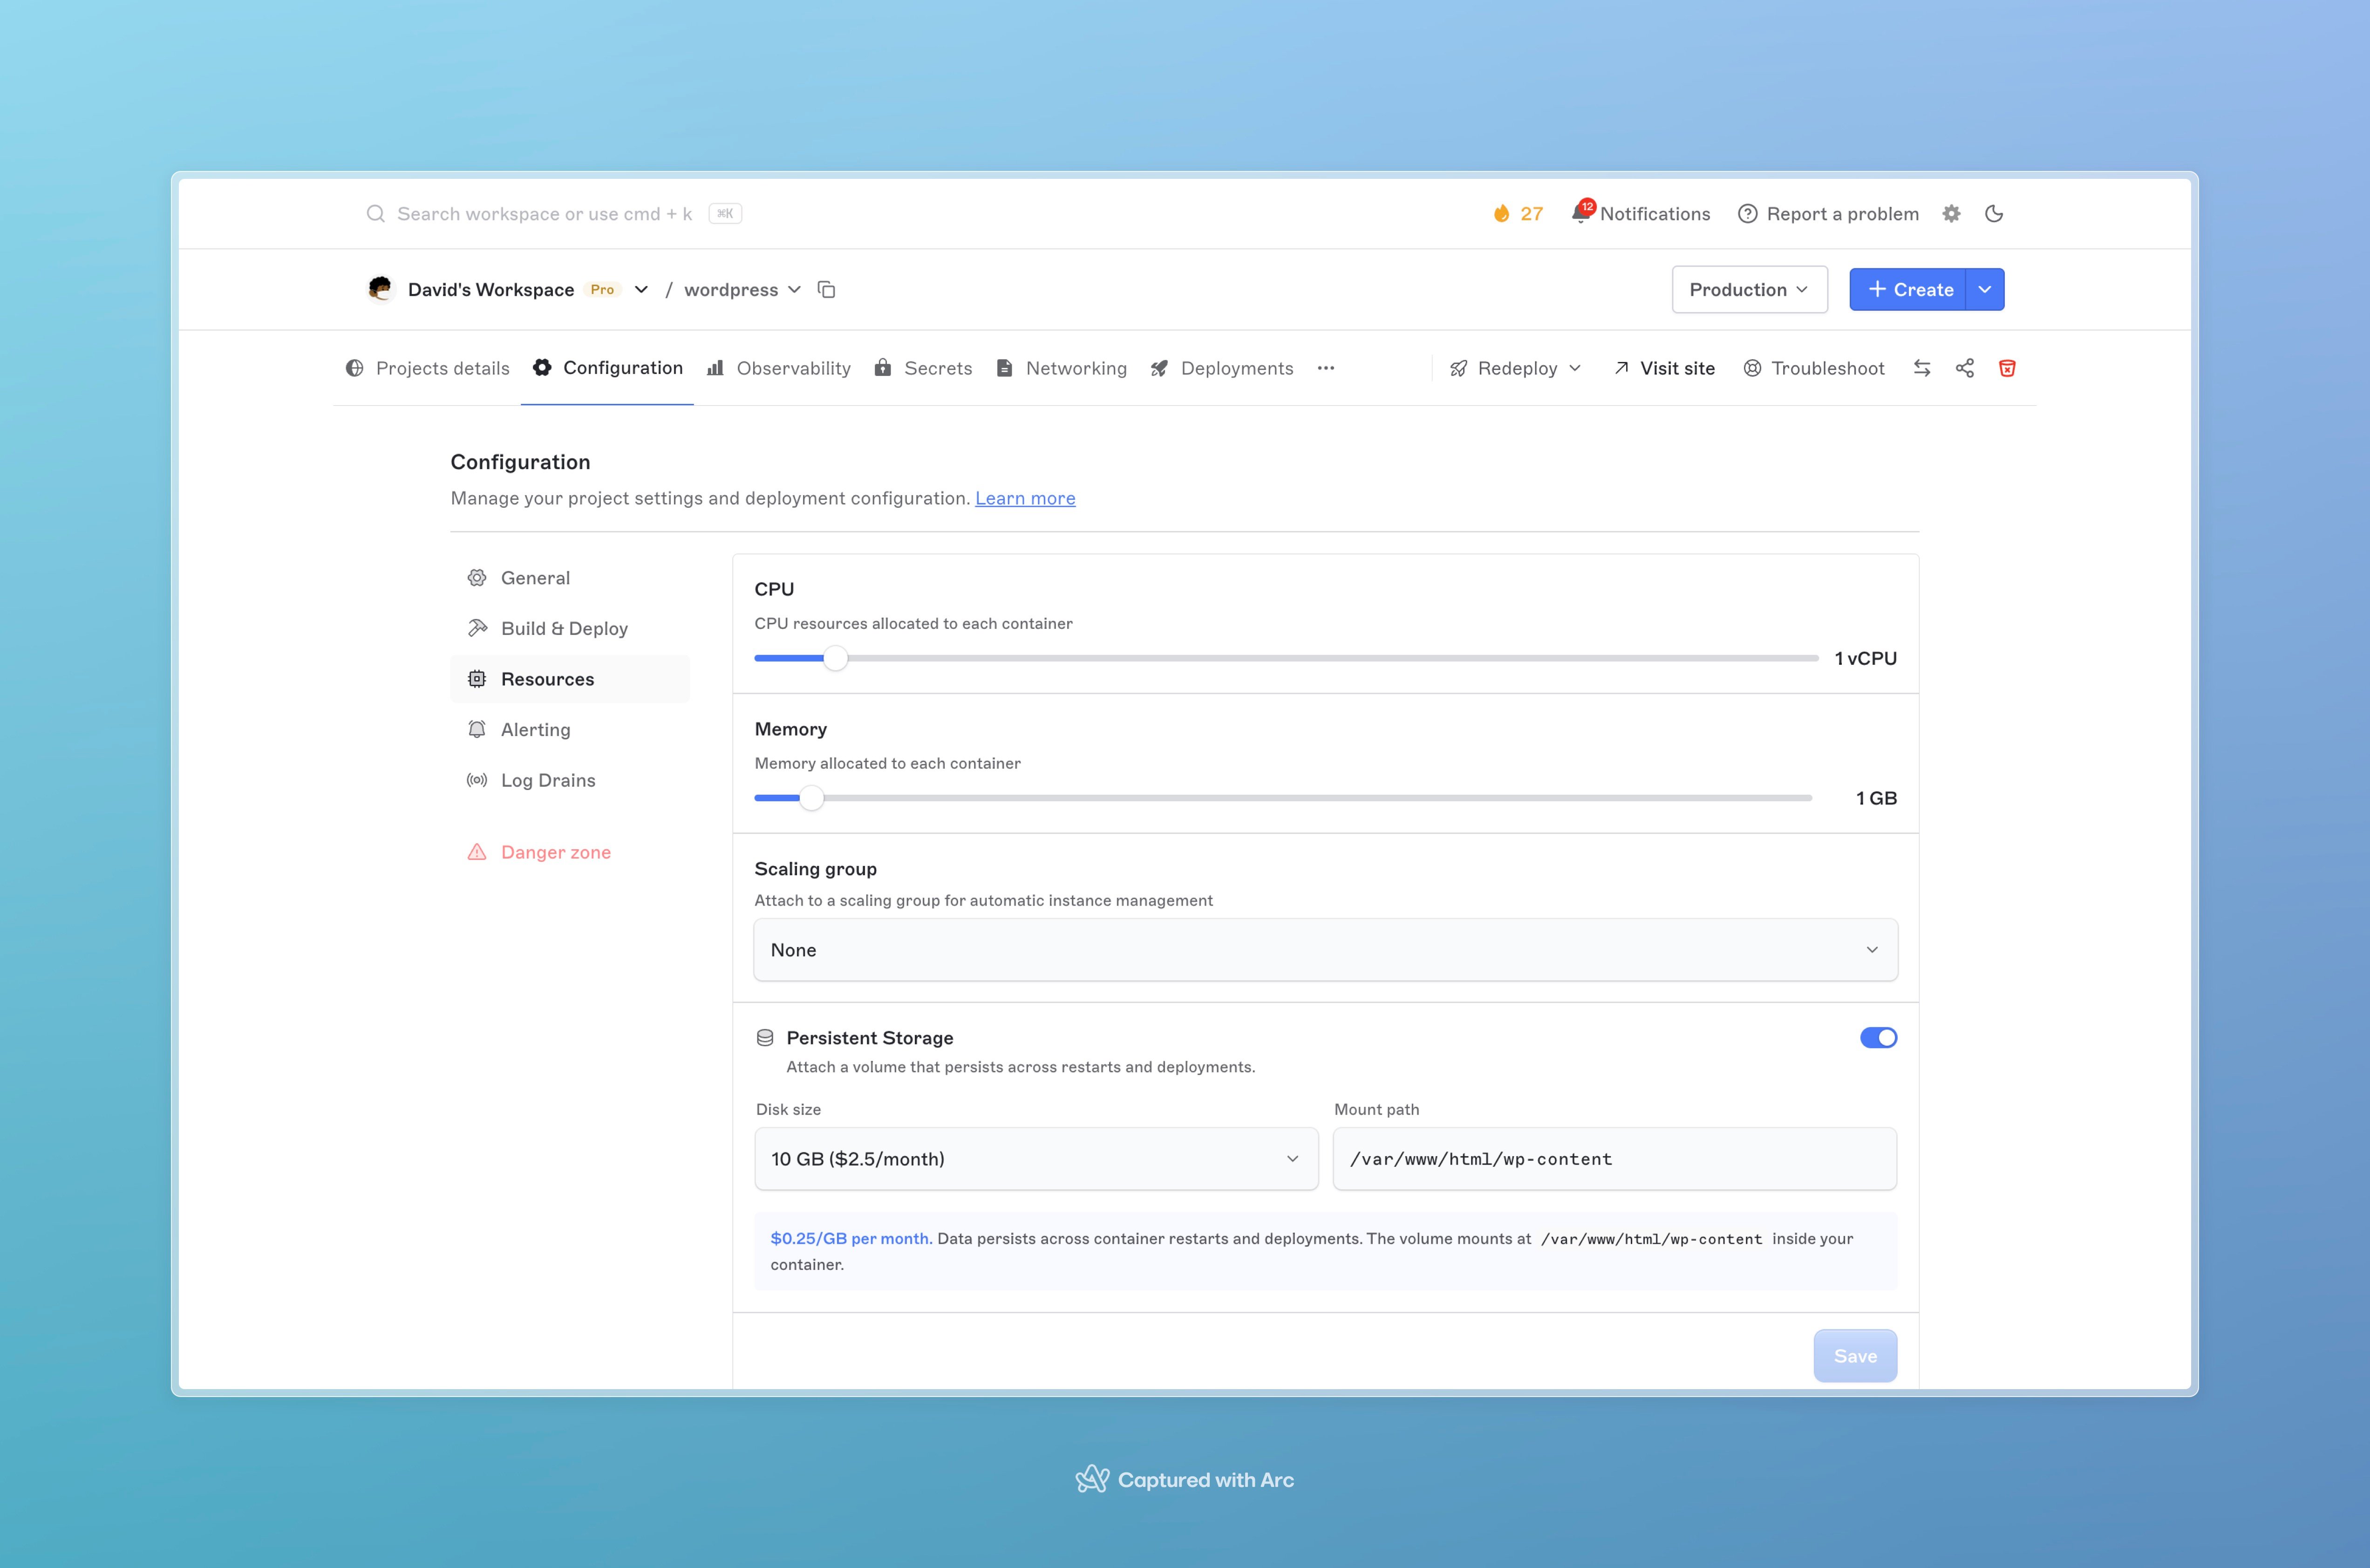
Persistent storage turned on, mount path set to /var/www/html/wp-content.
Deploy WordPress
Click Deploy project. Wait until the deploy finishes successfully.Step 4: Finish setup in your browser
- Open your free URL:
https://YOUR-PROJECT-NAME.brimble.app - Choose language, site title, and admin username.
- Use a strong password (not
admin/password). - Complete the wizard and log in to the WordPress dashboard.
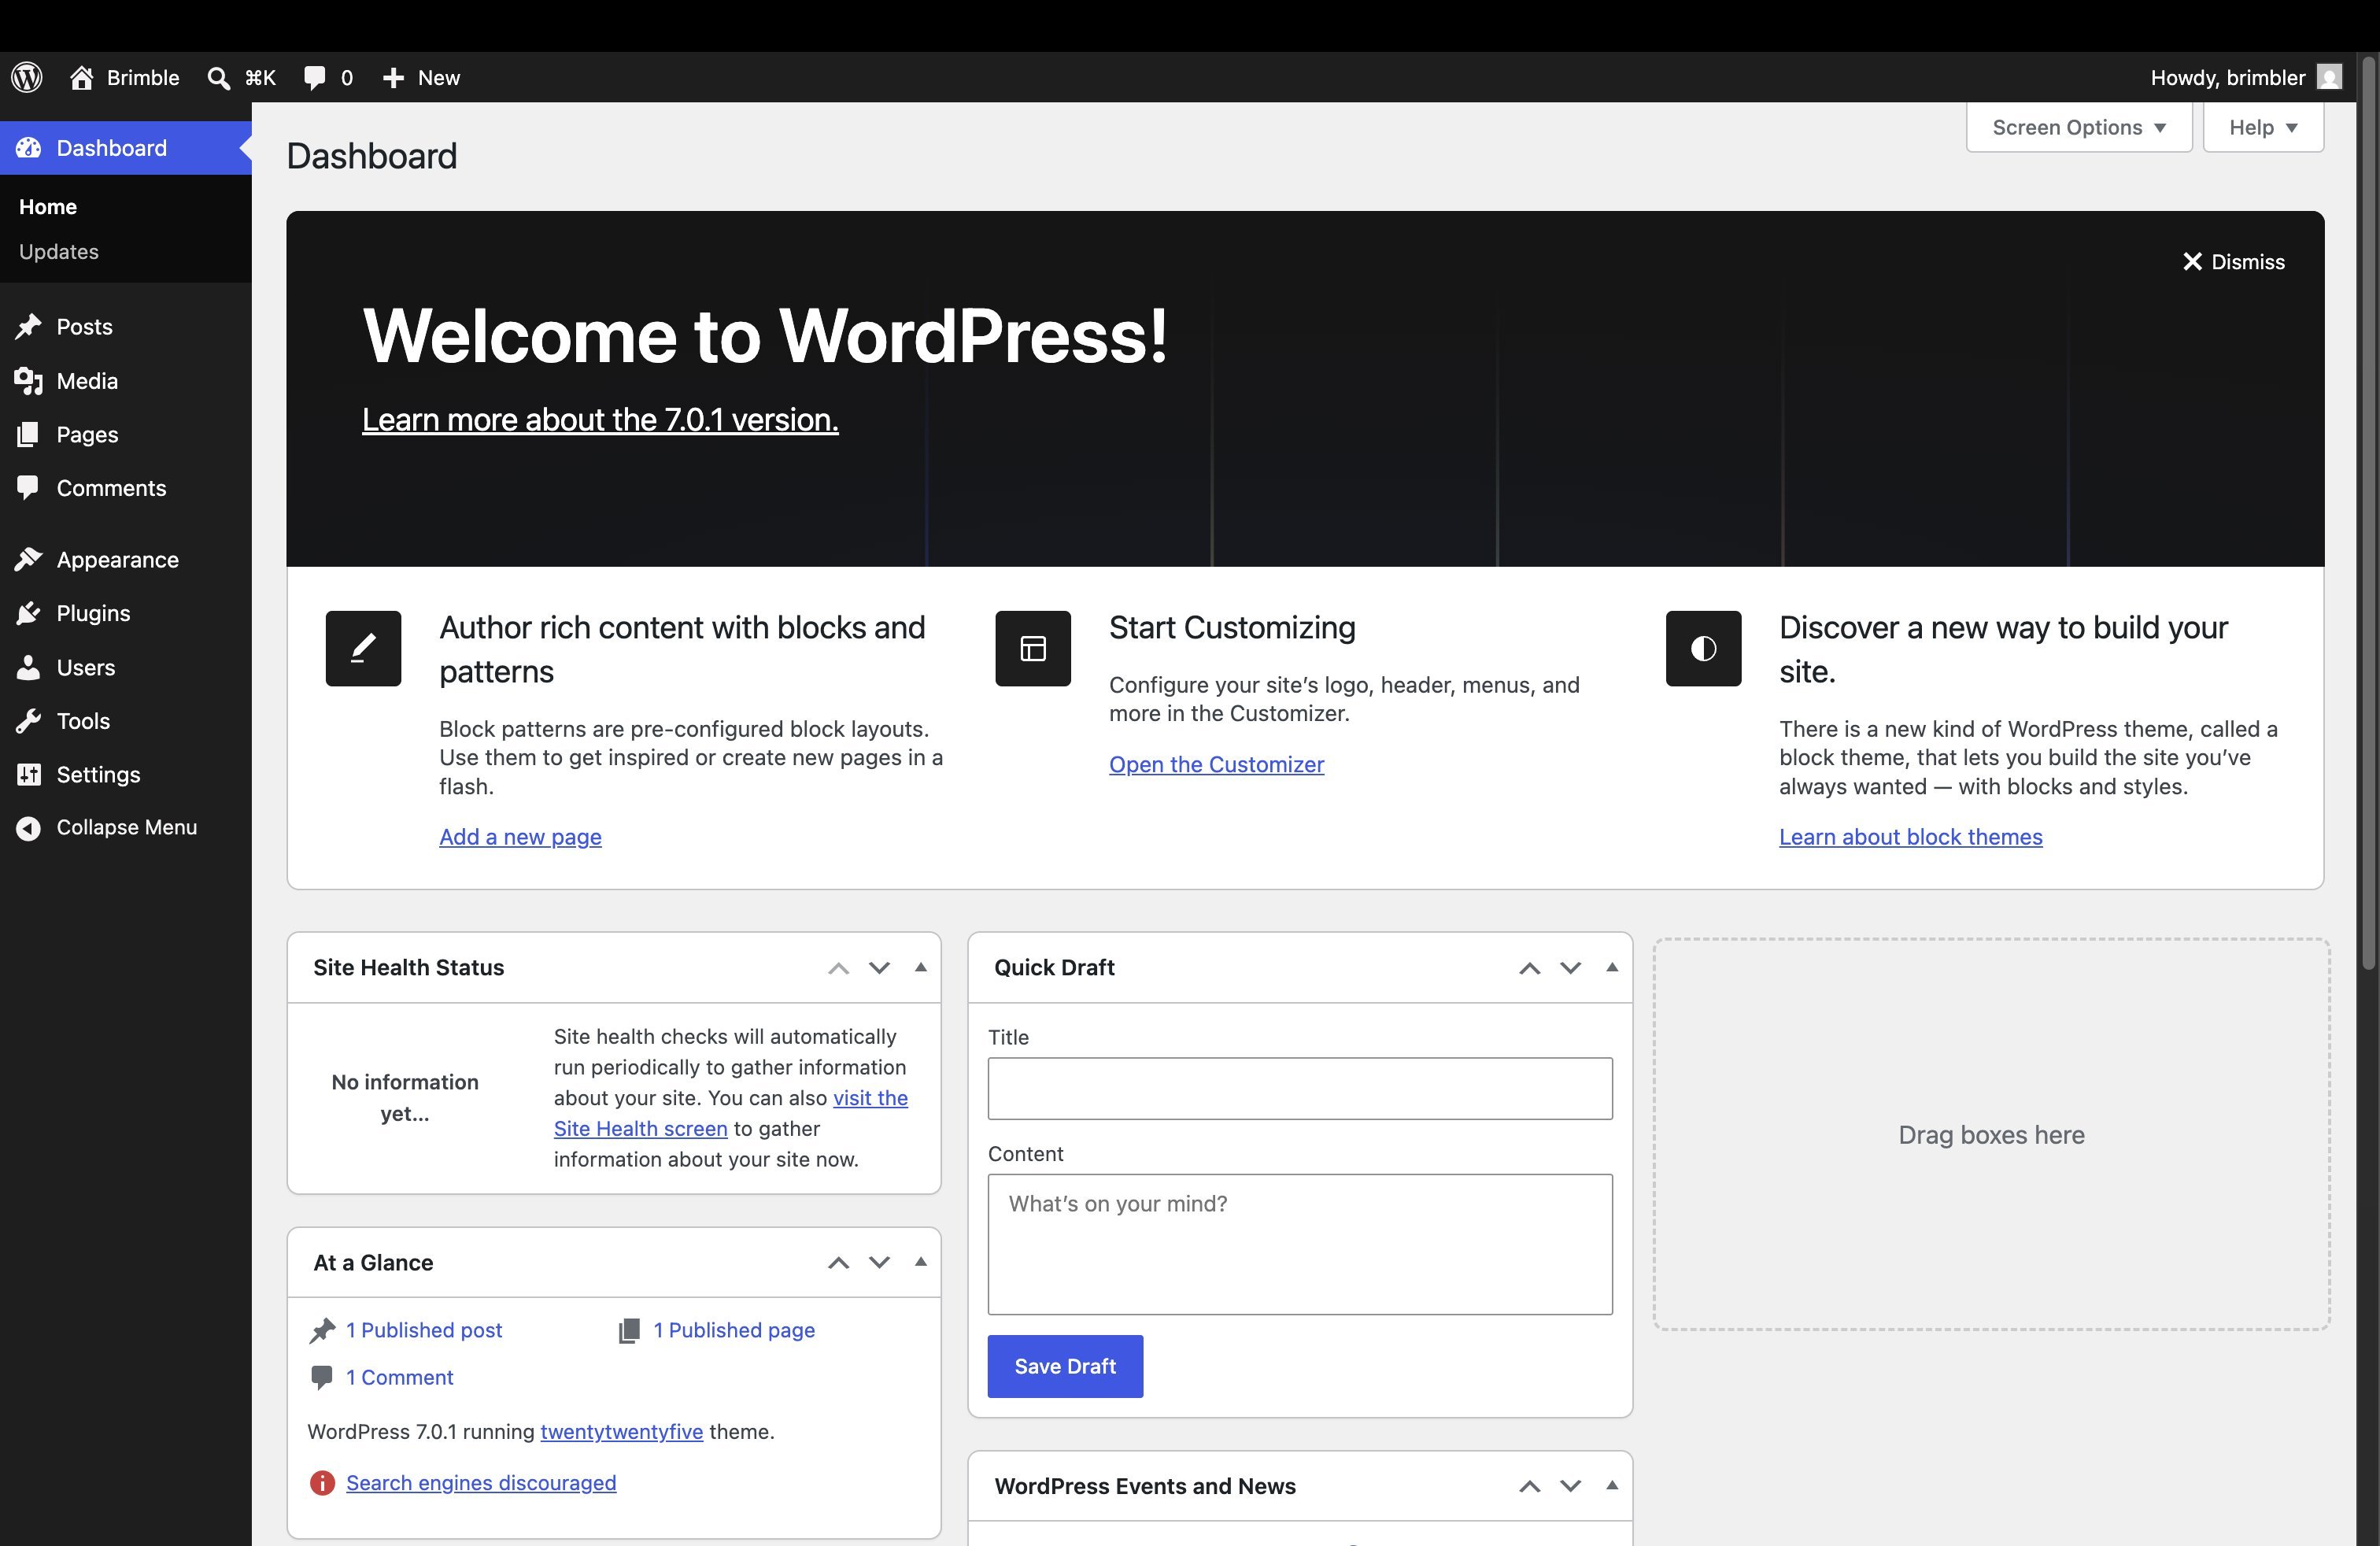
WordPress admin after a successful install.
If you see “Error establishing a database connection”
Work through this list:- Database project status is Active
- All four
WORDPRESS_DB_*secrets are filled in - PORT is 80
- Database host includes the port (for example
:3306) - Database and WordPress are in the same region if you used the private host
- You redeployed after changing secrets
Step 5: Turn on WordPress protection (recommended)
This blocks common automated attacks on WordPress (fake logins, known exploit paths, and similar noise).- Open your WordPress project.
- Open the Networking tab.
- Under Network (edge cache, headers & firewall), click Configure.
- Open the Firewall tab.
- Turn WordPress protection on.
- Leave Path blocking on.
- Click Save changes.
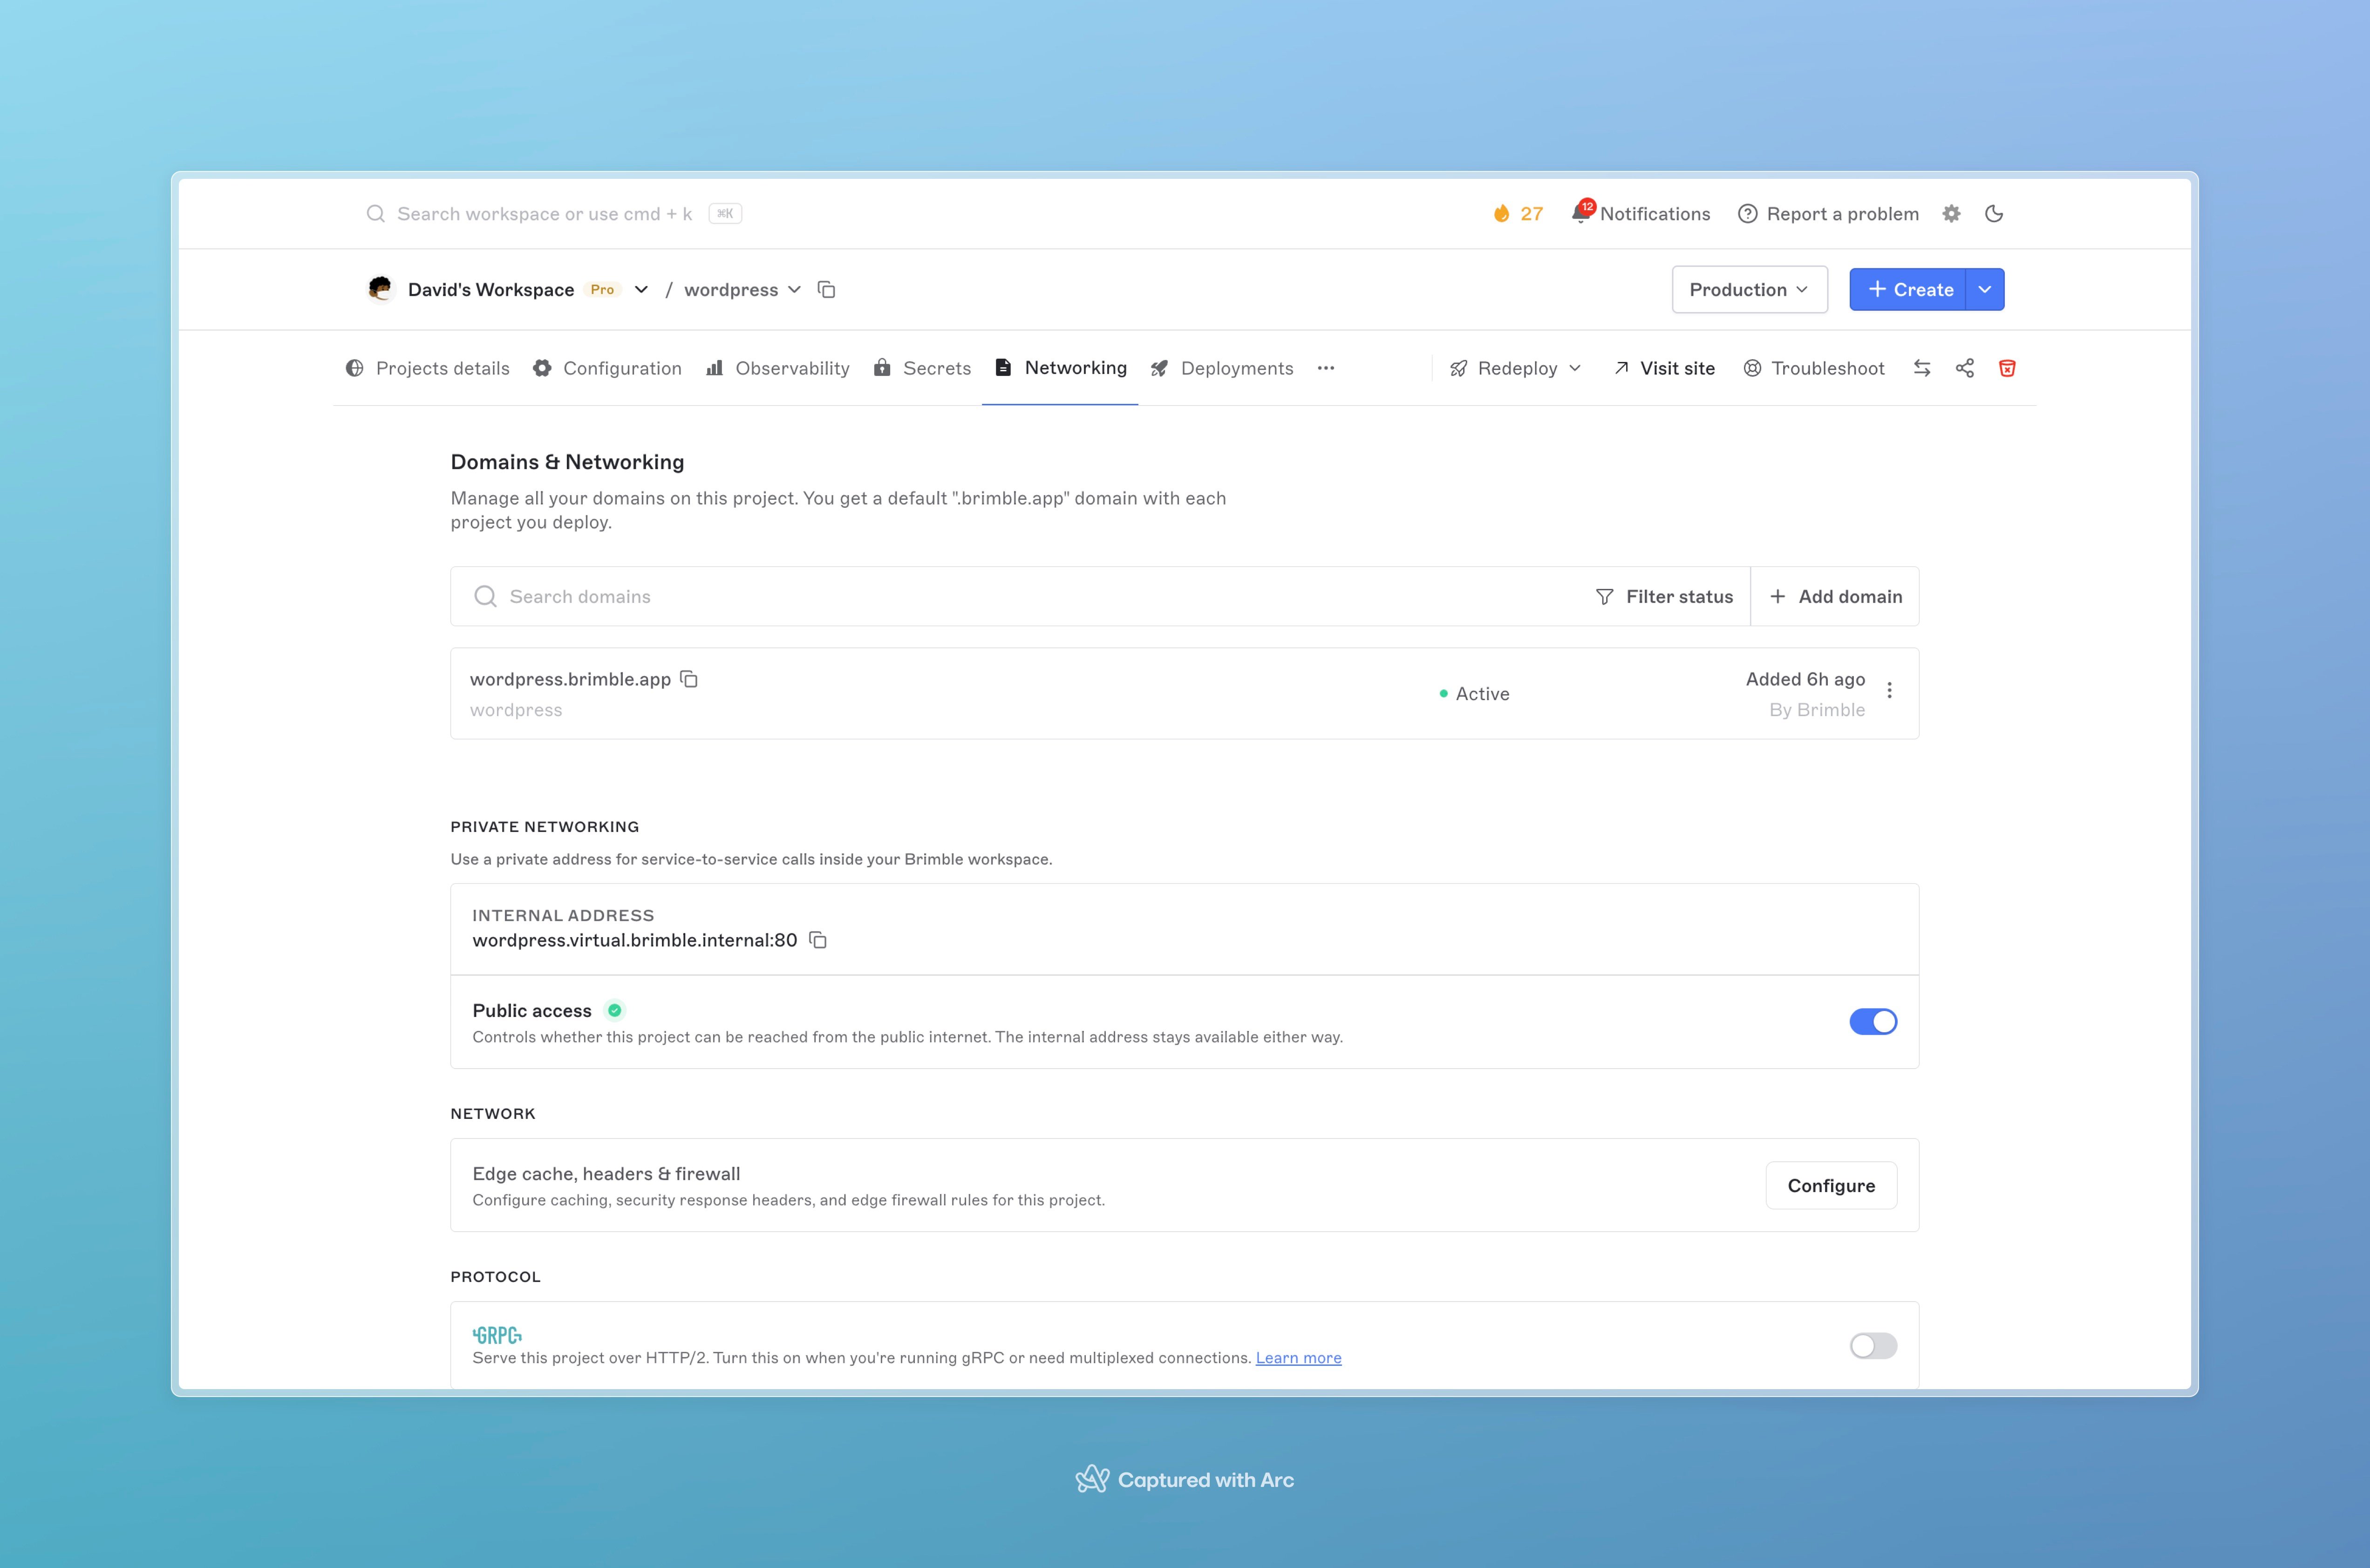
Networking tab: open Configure next to edge cache and firewall.
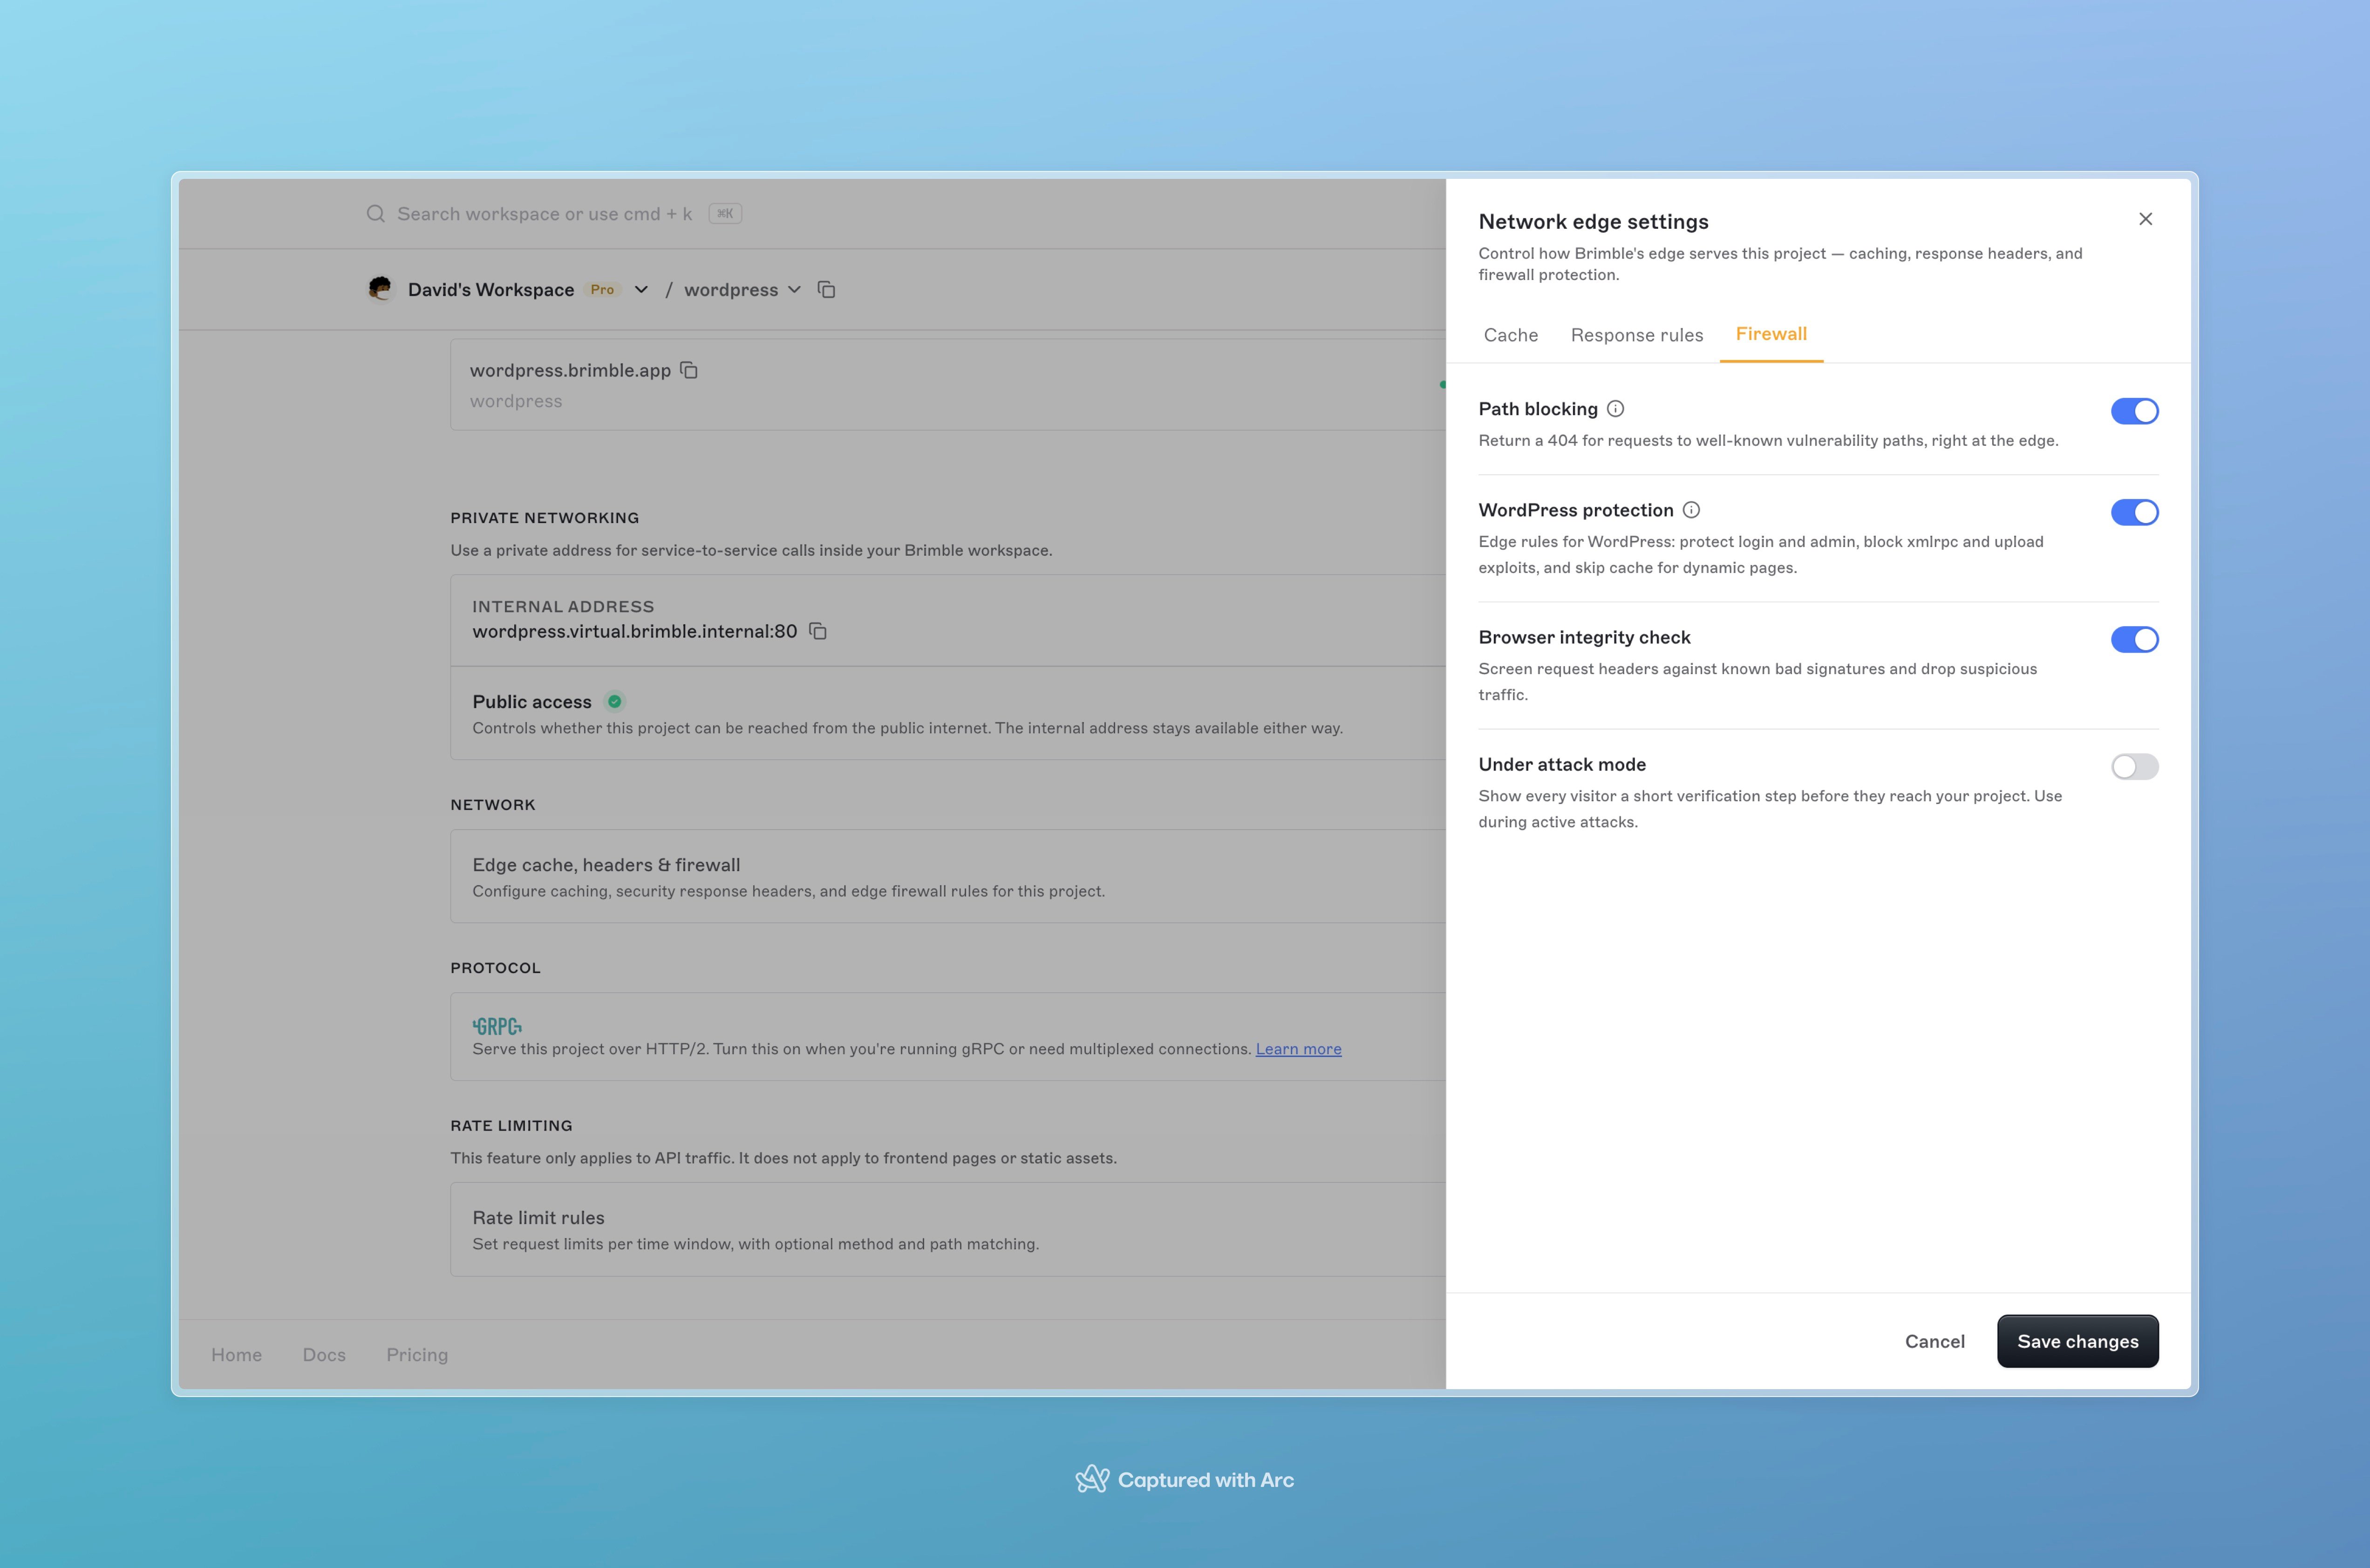
Firewall settings with WordPress protection turned on.
A few plugins or phone apps need XML-RPC. If something stops working after you enable protection, turn WordPress protection off temporarily and contact support if you need a special rule. Most sites do not need XML-RPC open.
Step 6: Add your own domain (optional)
Still on the Networking tab:- Click + Add domain.
- Follow the DNS instructions Brimble shows (usually at your domain registrar).
- Wait until the domain shows as Active and HTTPS is ready.
- WordPress Address (URL) to your live
https://…address - Site Address (URL) to the same
Step 7: Larger uploads (optional)
If media uploads fail because files are “too large”, you can raise PHP limits with Files. This is for small text config files only (not for photos; photos go in the media library and live on your volume).- Open the WordPress project.
- Open Files and click Add file.
- Example:
Example file content:
- Click Create.
- Redeploy so the file is mounted.
- Try the upload again.
/.
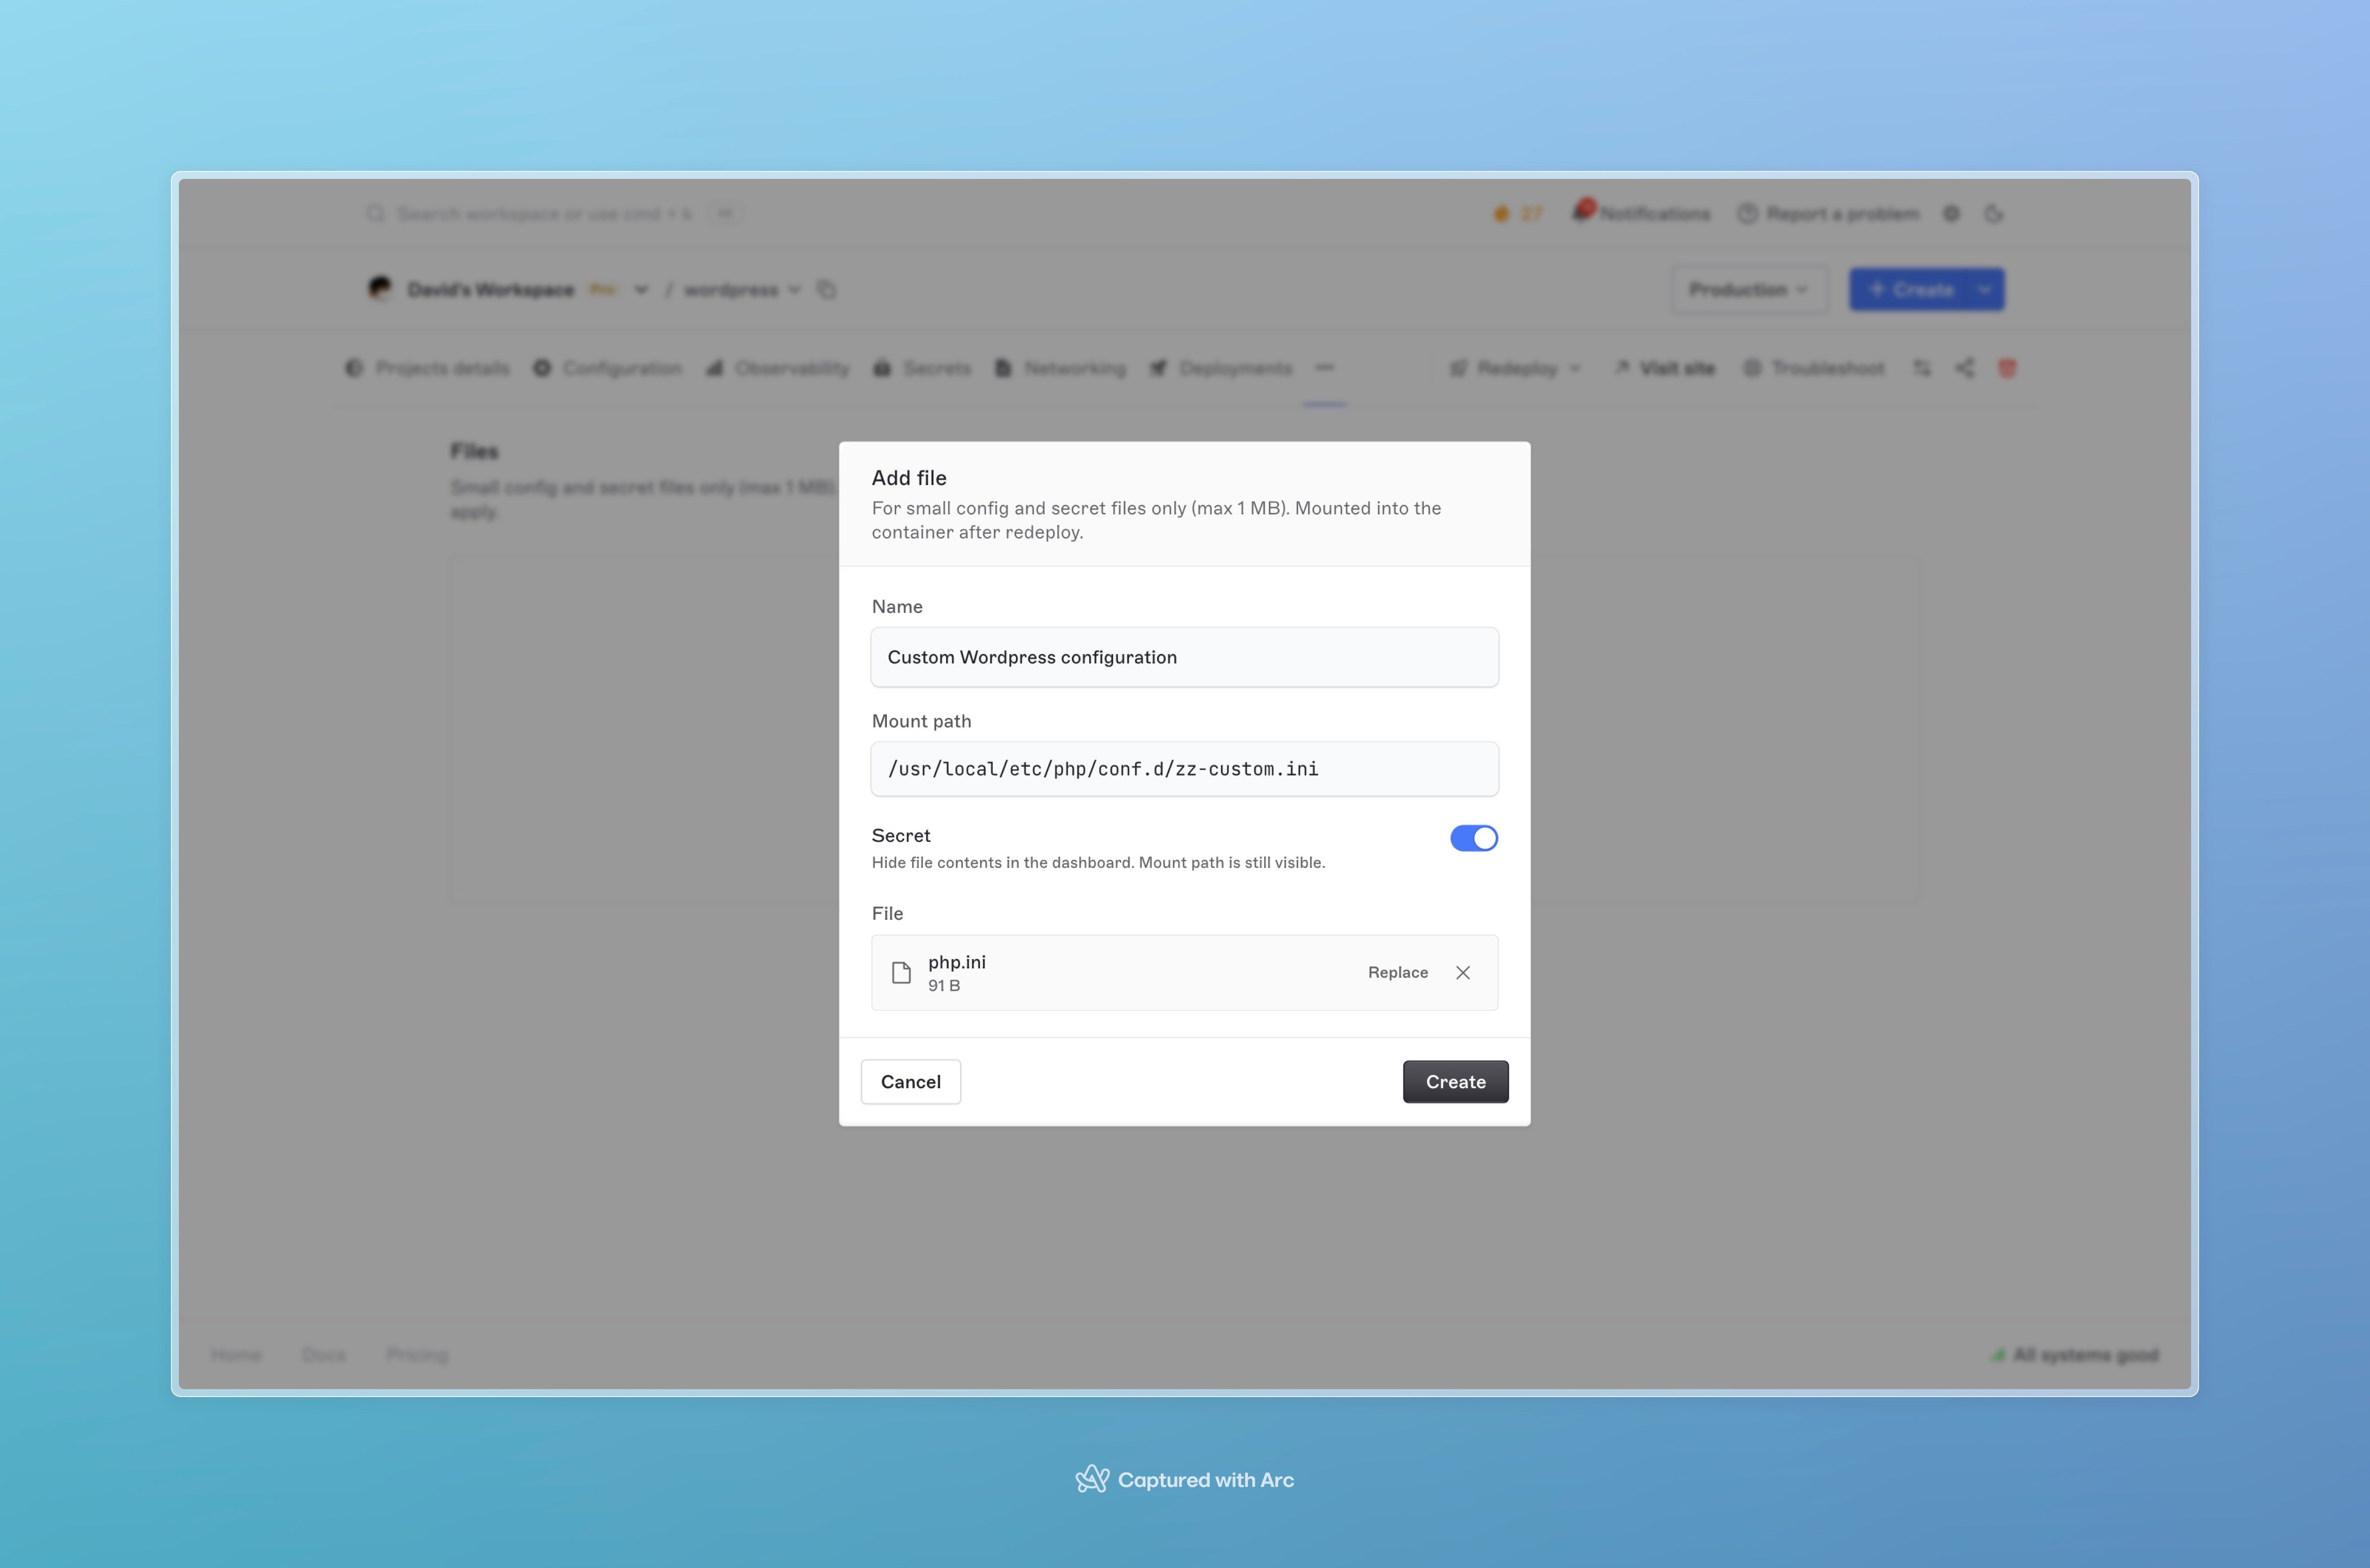
Add file modal for a custom PHP settings file.
Common problems
Error establishing a database connectionCheck Active database, secrets, PORT 80, same region for private host, then redeploy. Uploads disappear after redeploy
Turn on persistent storage at
/var/www/html/wp-content.
Site feels broken after attaching storageMount path must be
/var/www/html/wp-content, not /var/www/html.
Upload says file is too largeUse Step 7 (Files) and check free space on the volume. Extra check page when logging in
WordPress protection may show a short browser check. Complete it, or turn protection off temporarily. App or plugin that needs XML-RPC stopped working
Turn WordPress protection off or ask support for a custom rule. Site shows an error right after deploy
Wait a minute for first boot, open Deployments / logs, confirm the image is
wordpress:… and PORT is 80.
Quick checklist before you go live
- Strong WordPress admin password
- Database created before WordPress
- Private database host when possible
- PORT is 80
- Storage at
/var/www/html/wp-content - WordPress protection on
- Path blocking on
- Site URLs use https:// in WordPress settings
- Only trusted plugins and themes; keep WordPress updated